How to book an appointment on Opendock.com
Section 1: Account Registration
Section 3: Booking a pickup appointment
Section 4: Booking a return appointment
Section 5: How to change or cancel an appointment
Section 6: Edit profile & Change password
Overview
These instructions outline the steps required for an agent to book an appointment for pickups or product returns at the Trillium facility.
Keep in mind the following:
- You must wait at least six minutes after making payment in the LCBO Agent Portal before finalizing your appointment in Opendock – this allows time for the shipments to interface between systems. Booking your appointment too soon will result in an “Order Not Found” error. To edit these errors, review details in the FAQ. Keep in mind, best practice is to complete all your payments , then request your appointment with all the Shipment Numbers in Opendock.
- For next day appointments, you must enter valid Shipment Numbers by 2PM. DO NOT make changes after this cutoff time. This will result in error messages and the post cut off changes will not take effect.
- If you get any errors – take immediate action. “Correction Required” notifications automatically cancel the appointment if not addressed within an hour or before the cutoff time, whichever is earlier.
- DO NOT make Opendock appointment requests between 1 AM – 7 AM Monday to Sunday. Appointments made during this time will result in an “Order Not Found” error.
- If you need help, contact your Specialty Services B2B Representative (DO NOT contact Opendock – they will not be able to address your concerns) .
Section 1: Account Registration
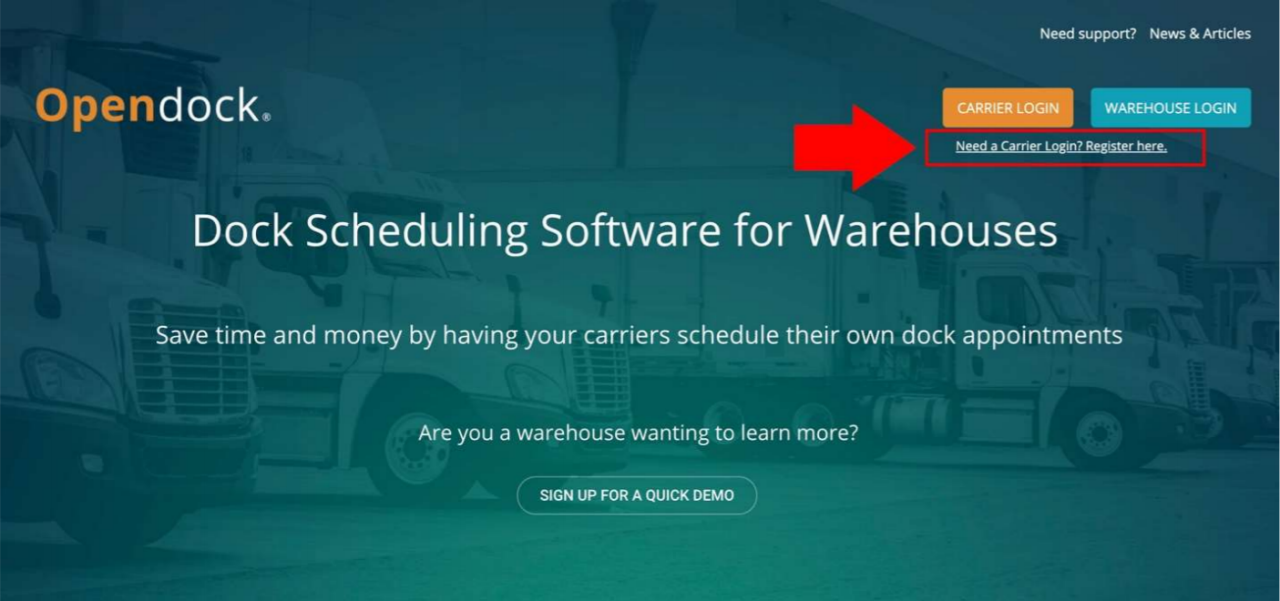
1. To book appointments at Trillium you must first register an Opendock account. Go to opendock.com and click Need a Carrier Login? Register here.
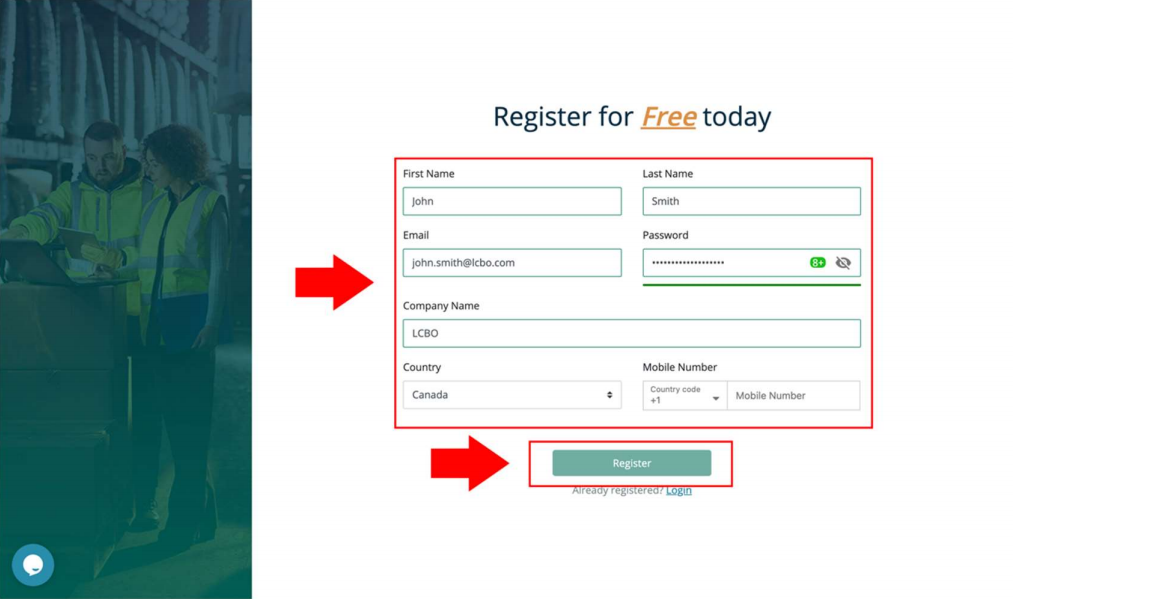
2. Complete the form and click Register. Ensure that the information entered is complete and correct as Trillium will use it for communication.
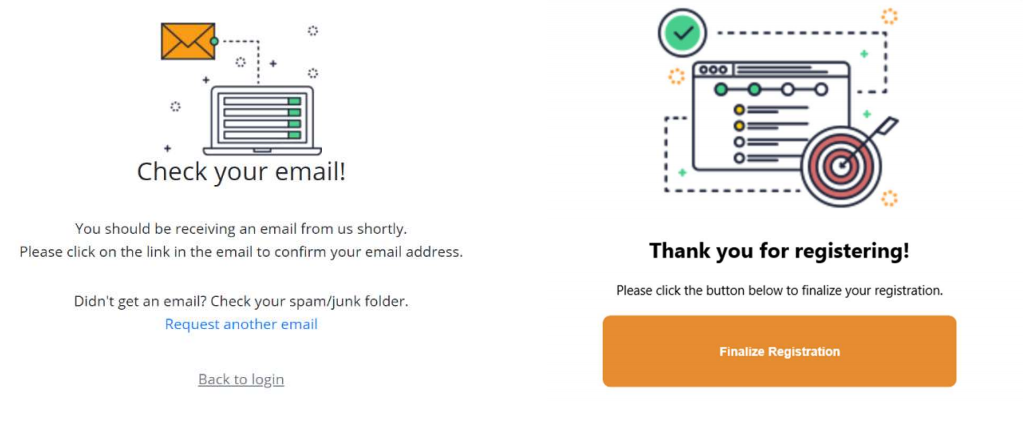
3. You will receive an email with a link to confirm your email address. Click the Finalize Registration button to complete the process. You can now log in to Opendock. Tip: If you don’t receive the email, check your junk mail folder.
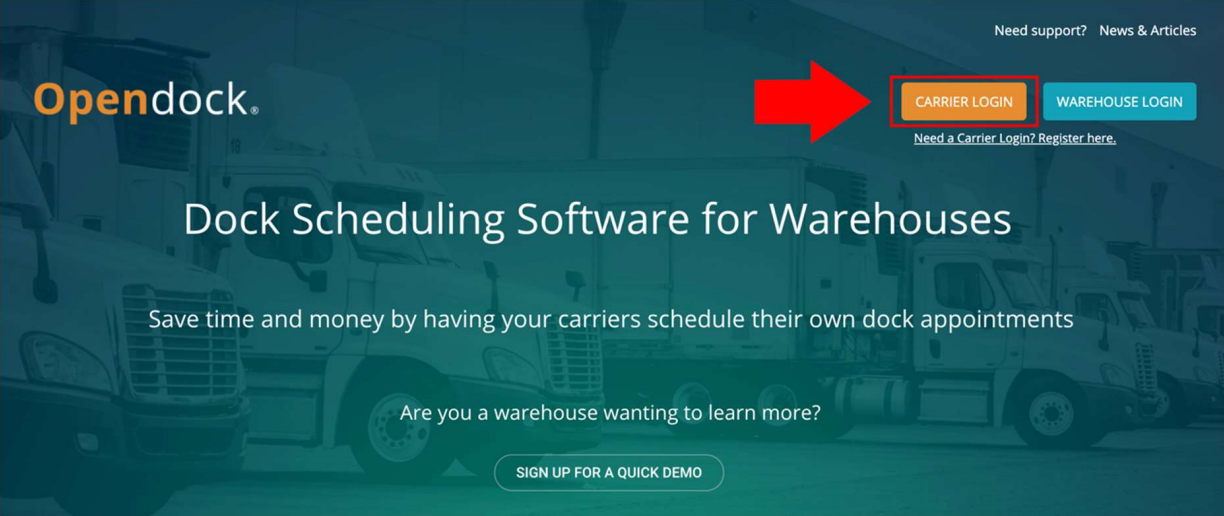
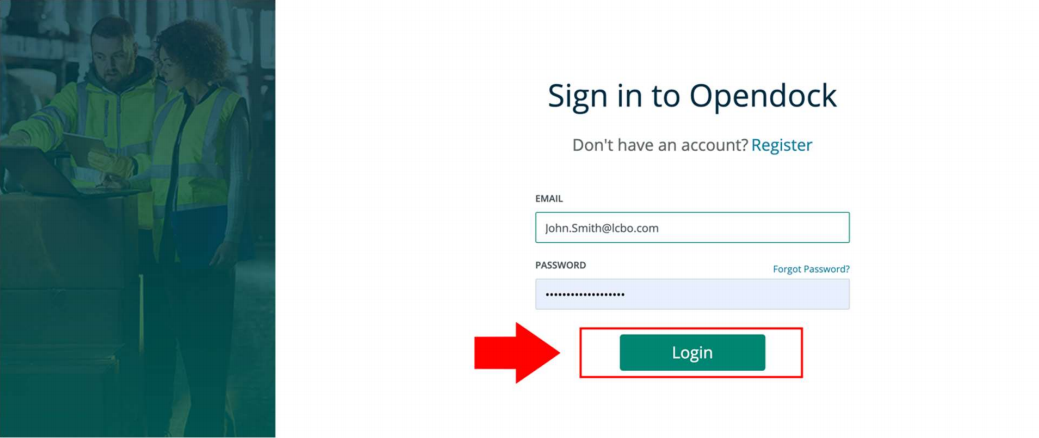
2. Enter the email address and password used to register the account and click Login.
Section 3: Booking a pickup appointment
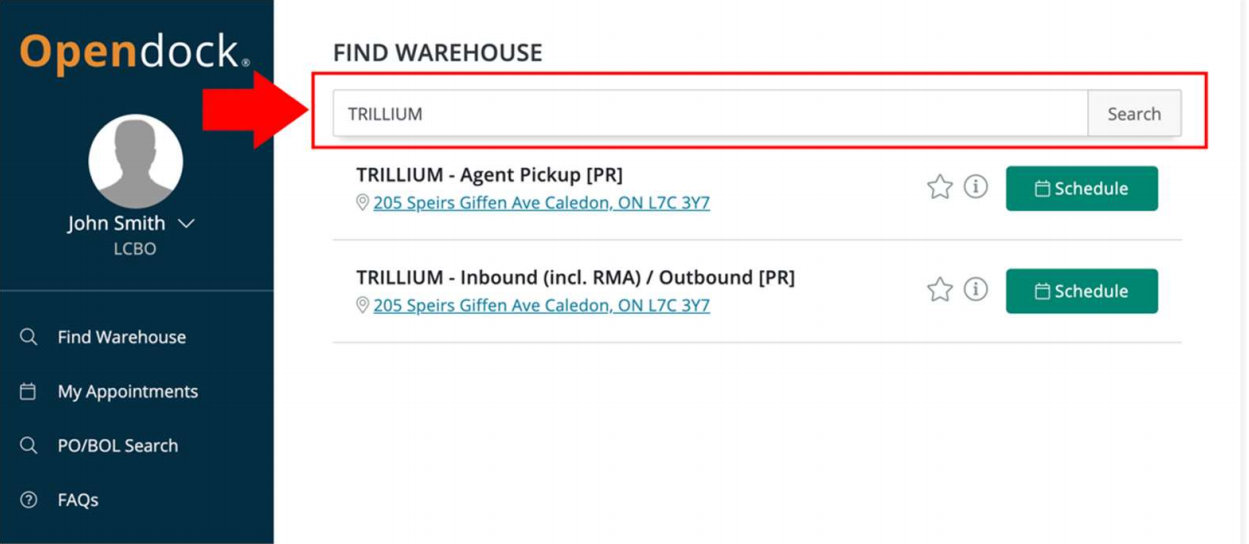
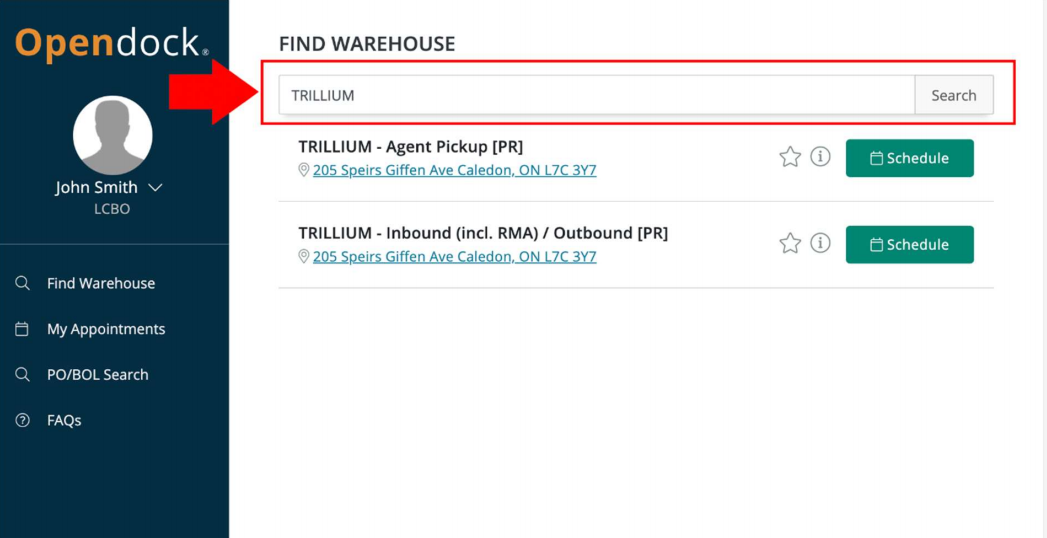
1. Once logged in, you will be directed to the main portal page. Type in “Trillium” under the Find Warehouse header and then click Search.
Click Schedule next to “TRILLIUM – Agent Pickup [PR]” for pickup orders.
Tip: Add Trillium to your favourites
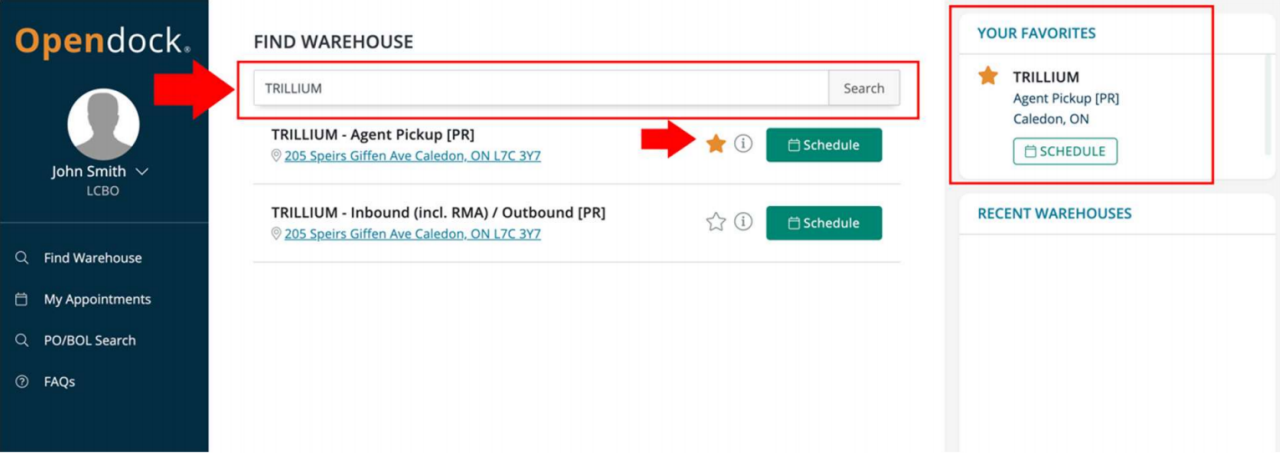
For pickups, click the ☆ button next to Trillium – Agent Pickup [PR] to add it to your favourites.
For returns, click the ☆ button next to Trillium – Inbound (incl. RMA)/Outbound [PR] to add it to your favourites.
It will automatically appear on the right side of your screen the next time you log in.
2. You will be directed to a Get Started screen. Click Book Appointments to begin the booking process.

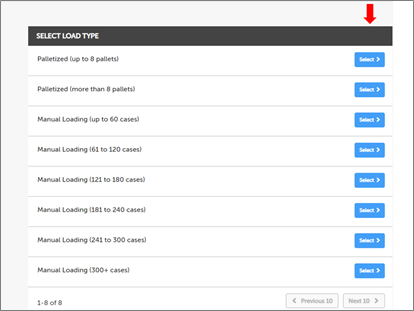
3. Next, select your LOAD TYPE. Select the accurate LOAD TYPE to match the total cases from all the Shipment Numbers to be included in the Appointment.
IMPORTANT: Please note that this is tracked for compliance.
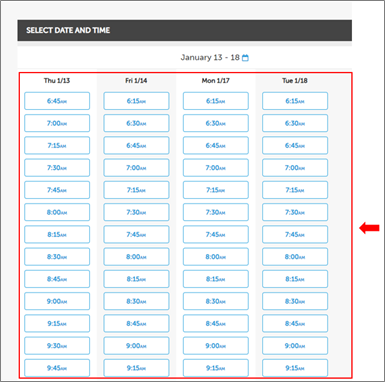
4. Select your preferred date and time for pickup.
Bookings can be made up to 7 calendar days in advance with valid Shipment Numbers. Next business day appointments will not be available after 2 PM EST of the current date. Only available appointment time slots will appear.
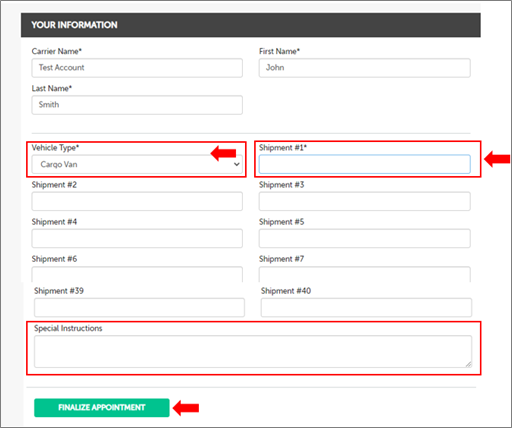
You will be directed to the YOUR INFORMATION screen to:
- Confirm your details (Carrier Name, First Name, Last Name)
- Select your Vehicle Type from the drop-down menu
- Enter all valid Shipment Numbers to be picked up during this appointment. Be careful not to make any errors or typos.
- In the Special Instructions Field, you can provide additional information. For example, you may want to include the driver’s name as FirstName LastName
- Click FINALIZE APPOINTMENT when all fields are entered. Tip: Please note, all fields with asterisk (*) are required to finalize the booking.
- You must wait at least 6 minutes after payment in the Agent Portal before you can FINALIZE APPOINTMENT in Opendock (It takes time for the systems to interface).
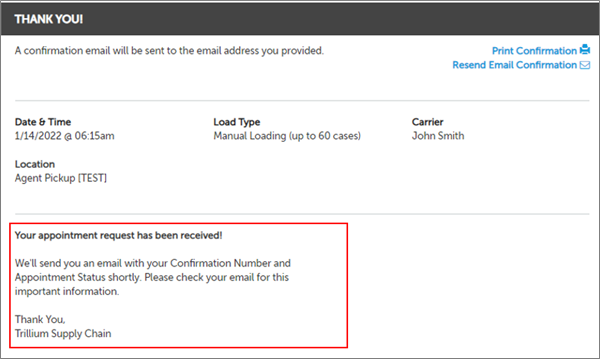
5. You will be directed to a THANK YOU! screen. Note the message indicating that “Your appointment request has been received!”
IMPORTANT: This does not mean that the appointment is confirmed at Trillium. You must check your email for key information including your Appointment Status, Appointment Number, and appointment Date and Time.
Section 4: Booking a return appointment
1. From the Opendock main portal page, type “TRILLIUM” under the Find Warehouse header and then click Search.
Click Schedule next to TRILLIUM – Inbound (incl. RMA) / Outbound [PR]
2. You will be directed to a Get Started screen. Click Book Appointments to begin the booking process.

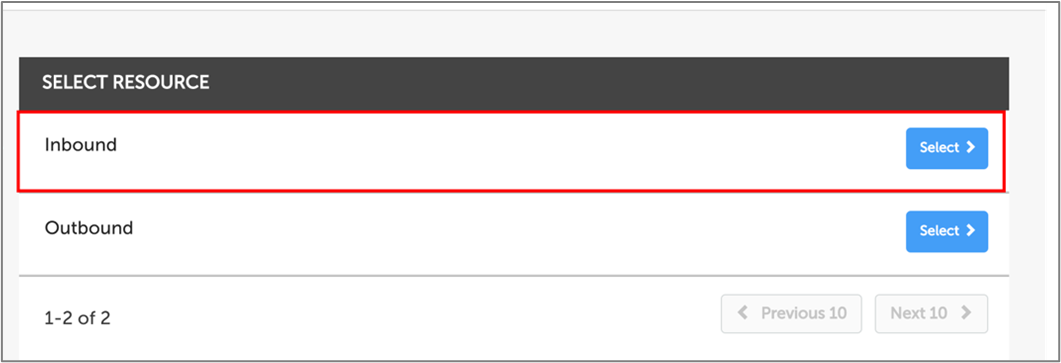
3. You will be prompted to specify the appointment type. Select Inbound.
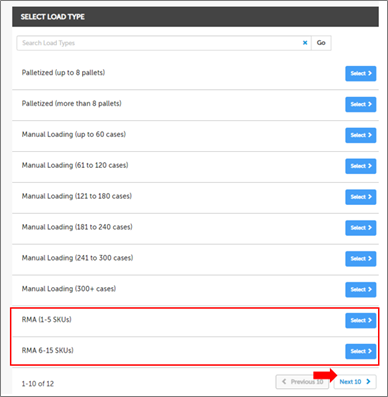
4. Next, select the appropriate LOAD TYPE. Note there are more selections by pressing Next 10.
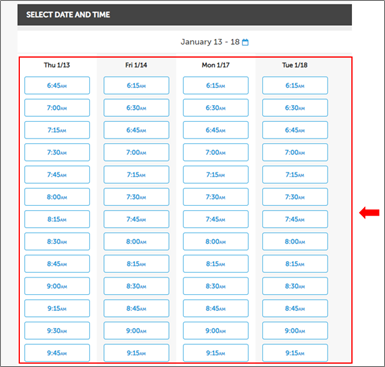
6. Select your preferred Date and Time for your return appointment.
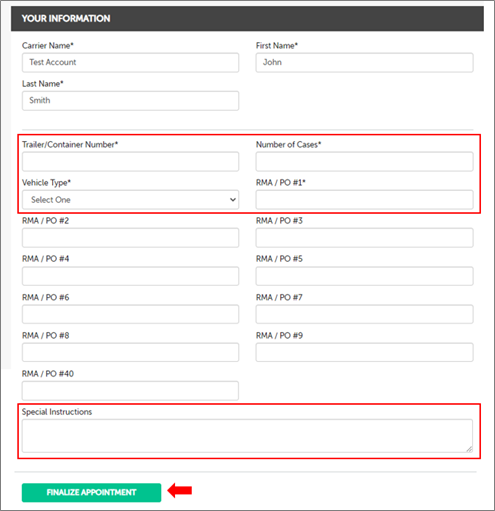
7. You will be directed to the YOUR INFORMATION screen to:
· Confirm your details (Carrier Name, First Name, Last Name)
· Enter your license plate number in the Trailer/Container # field
· Enter the total Number of Cases in all the RMAs to be included
· Select your Vehicle Type from the drop-down menu
· Enter all valid RMAs to be returned during this appointment
· Click FINALIZE APPOINTMENT
· To make an appointment for both a pickup and a return, you will need to book two appointments. First make an appointment for the pickup; then make an appointment for the return. Try to select similar times for both appointments. In the Special Instructions field of the return, indicate the Appointment Number of the pickup appointment.
8. You will be directed to a THANK YOU! screen. Note the message indicating that “Your appointment request has been received!”
IMPORTANT: A Requested Appointment does not mean that the appointment is confirmed at Trillium. You must check your email for key information including your Appointment Status, Confirmation Number, and appointment Date and Time.
Section 5: How to change or cancel an appointment
1. To edit or cancel an Appointment, go to the main Get Started screen and click APPOINTMENTS in the top right corner.

2. Select either RESCHEDULE, Cancel Appointment or Edit Appointment, make changes and save.

Section 6: Edit profile & Change password
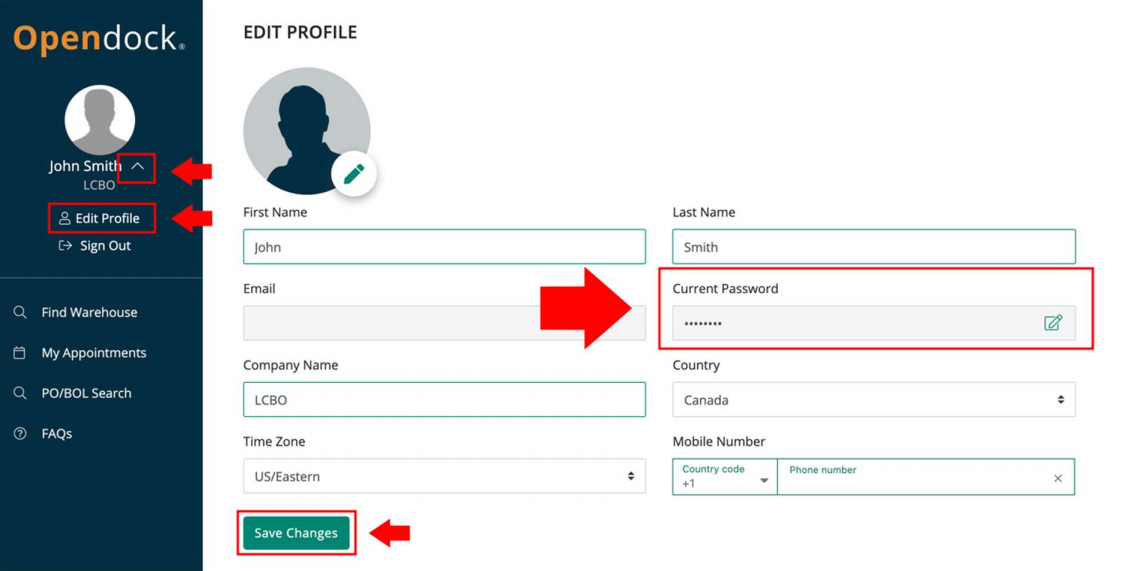
1. If needed, you can edit your profile or change your password from the main page. To make changes to your profile, click the chevron next to the username and choose Edit Profile.
2. In the password field, click the edit button. Enter your current password followed by your new password. Click Save Changes once complete.
Section 7: Help
Do not contact Opendock or use the Opendock Chat feature for any questions.
If you have questions or require support, please review the Frequently Asked Questions or contact your Specialty Services B2B Representative or psinfo@lcbo.com
